 Giftpin
Registry guide Registrants
Create your gift registry
and share one link
How to start a Giftpin registry, add gifts from this store and anywhere else, and share it with your guests. Bold text is exactly what you'll see on screen.
Get started
Start your registry
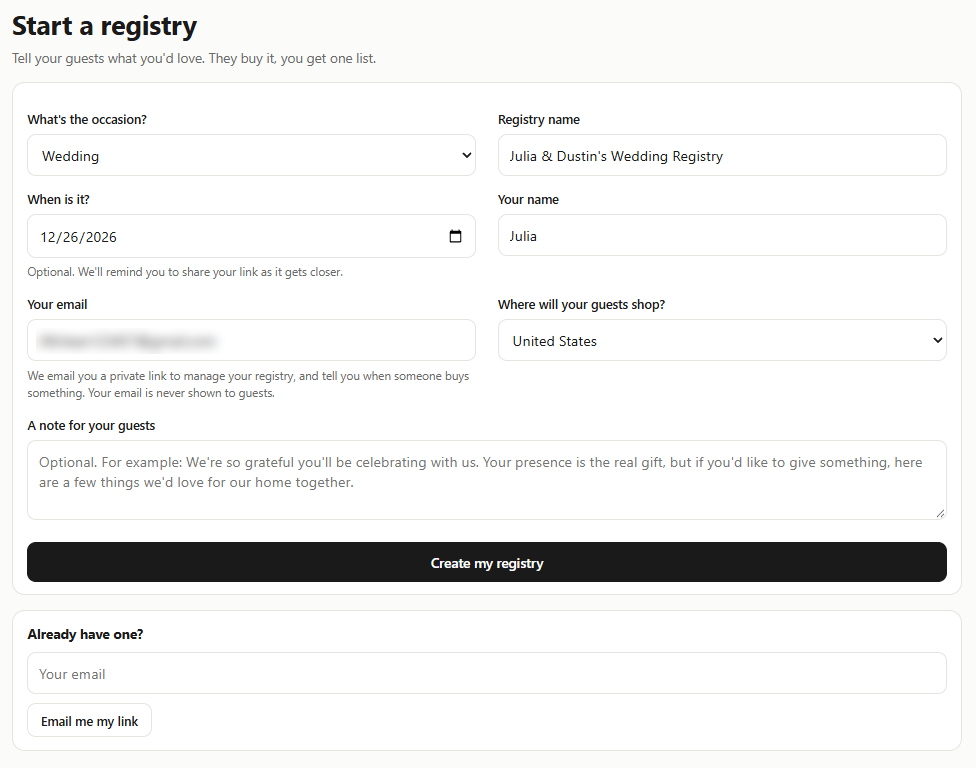
- On the store's website, click Create a gift registry (usually under the header or in the menu). You can also press Add to registry on any product, and you'll be asked to start one.
- Choose the occasion under What's the occasion?, then fill in Registry name, When is it?, Your name and Your email.
- Under Where will your guests shop?, pick your guests' country. Giftpin uses it to suggest stores for things this store doesn't sell.
- Optionally write A note for your guests, then click Create my registry.
Keep your private link
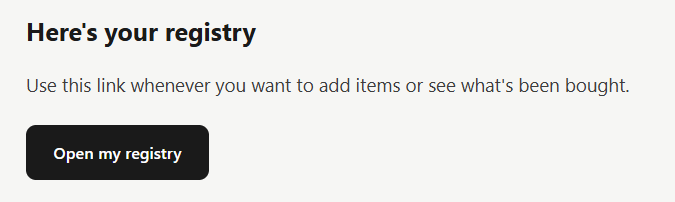
- Giftpin emails you a private link to manage your registry. You don't need an account or a password: that link is your way in, so keep the email. It works for 90 days.
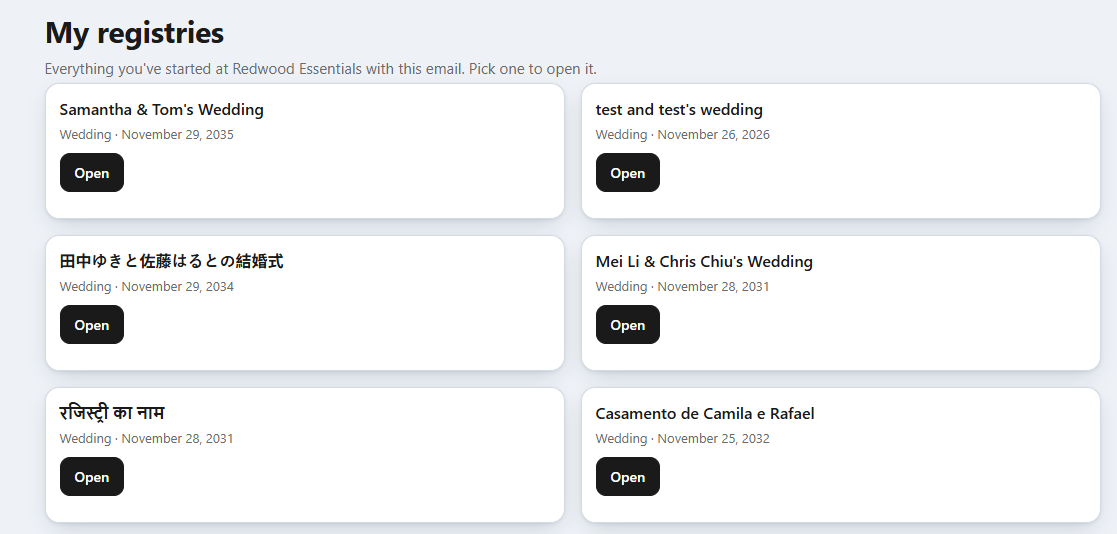
- Lost it, or it stopped working? On the store's create-a-registry page, under Already have one?, enter your email and click Email me my registries. The link you get lists every registry you've started with that email.
- Never share this link. Anyone who has it can edit your registry. Guests get a different link (see Share it below).
Add your gifts
From this store, and from any other website.
Add this store's products
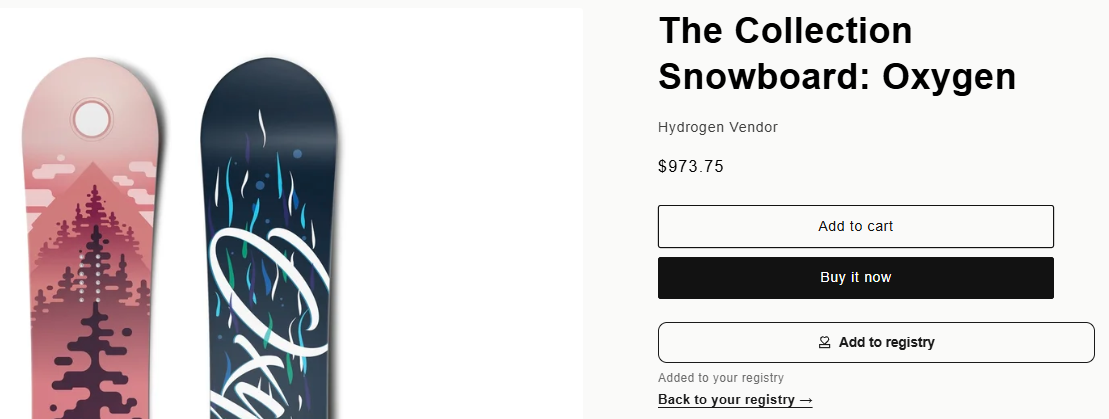
- Browse the store and click Add to registry on any product page. You'll see Added to your registry and a Back to your registry link.
- Pressing it again on the same product asks how many you'd like in total, so nothing gets added twice by accident.
- Using a different phone or computer? Open your private link from the email there first, so the button knows which registry is yours.
Add gifts from any other website
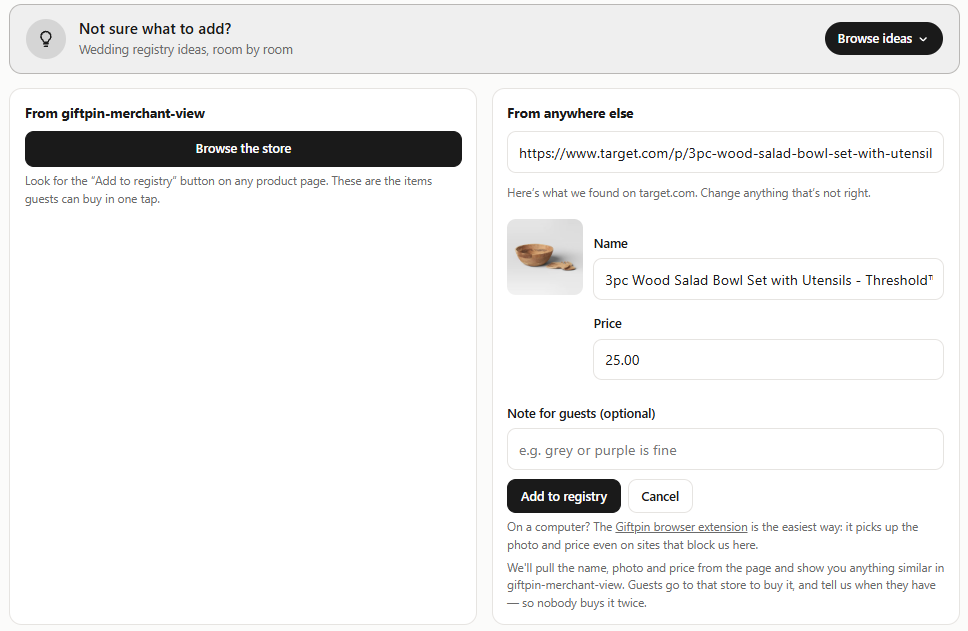
- On your registry, go to Add items, paste the product's address into Product link and click Look it up. Giftpin fills in the name, photo and price.
- Some big stores block this. If that happens, type the Name and Price yourself and click Add to registry.
- Giftpin may show something similar from this store. Click Preview & swap to see it, or keep your original.
Or use the Chrome extension
- On a computer, install the Giftpin extension for Chrome.
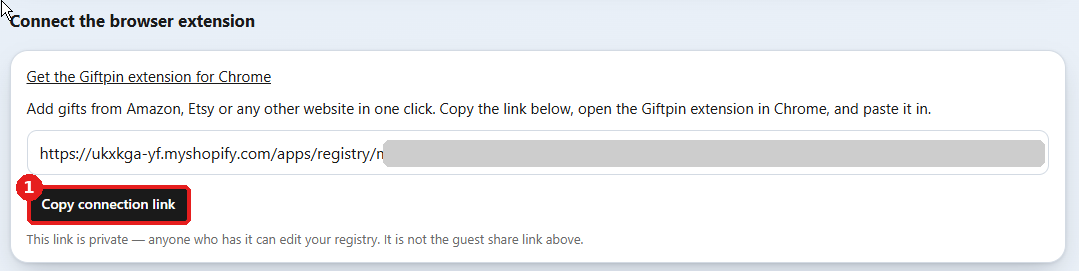
- On your registry, under Connect the browser extension, click Copy connection link.
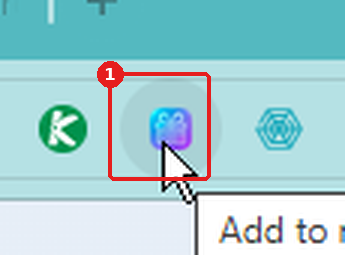
- In Chrome, click on the Giftpin Chrome plugin.
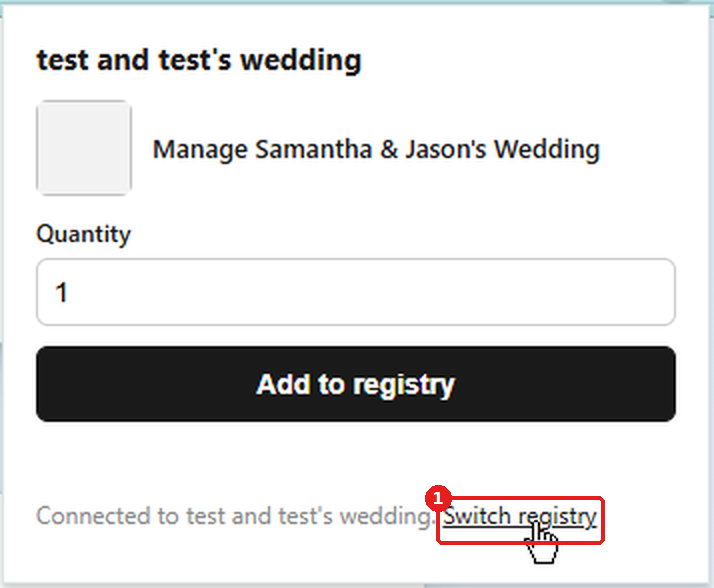
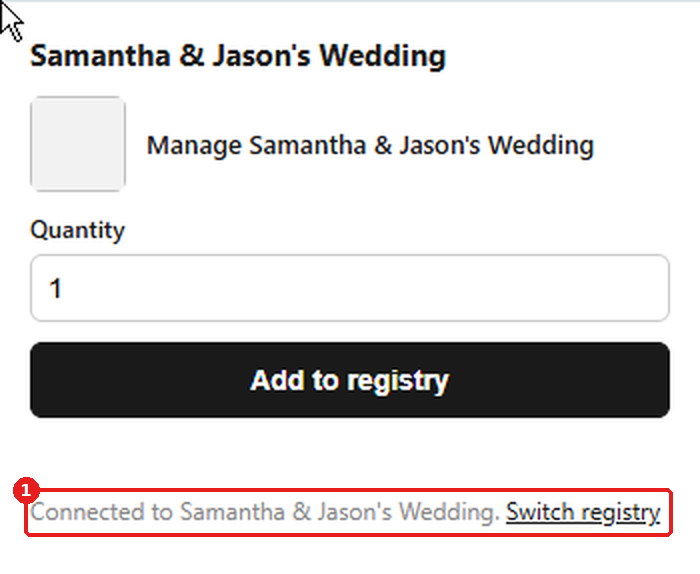
- If the plugin already shows a registry, click Switch registry.
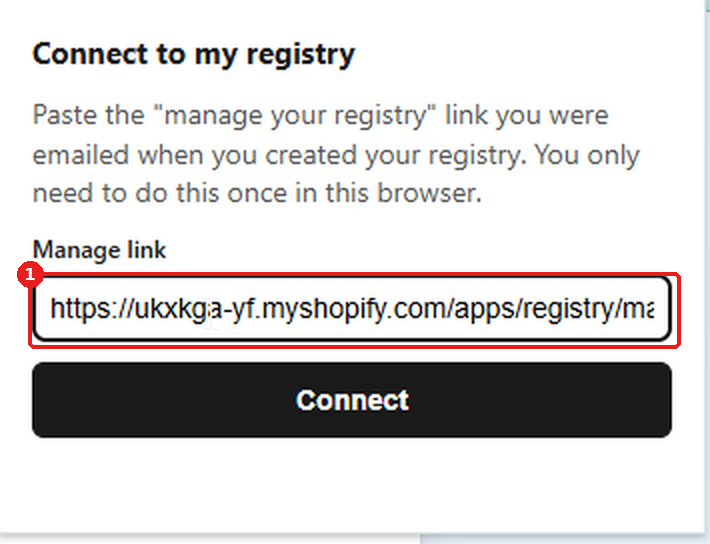
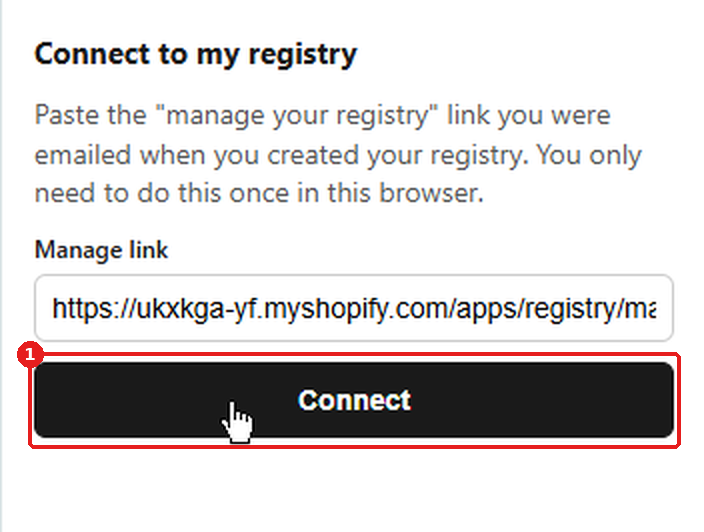
- Paste the link into Manage link and click Connect. You only do this once.
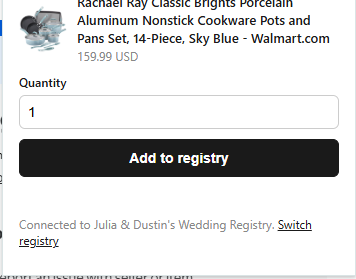
- Now, on any product page on any website, click on the Giftpin Chrome plugin, choose the Quantity and click Add to registry.
In the shop? Scan a barcode
- If the store offers it, open your private link on your phone and tap Scan a barcode in the store. Point the camera at a barcode on a tag or box, and the product is added to your list.
- Allow the camera when your phone asks. If it can't open, type the number under the barcode into Barcode number and tap Look up.
- Fill the screen with one barcode, so a neighbouring one isn't read by mistake.
Fine-tune your list
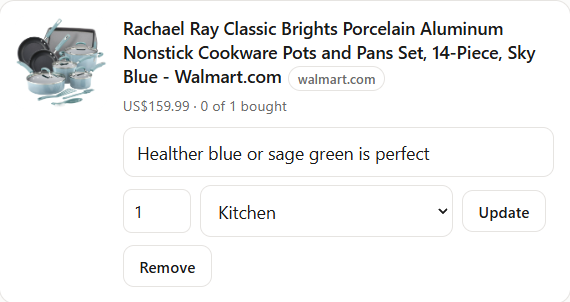
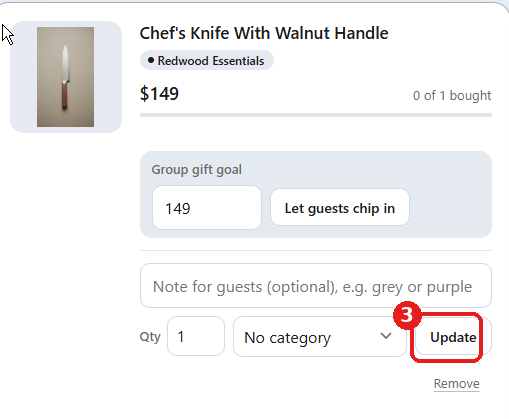
- Under Your list, open any item to change Qty, add a Note for guests (a size or colour, say) or pick a Category, then click Update.
- Not sure what to add? Tap Browse ideas for ideas for your occasion.
Share it
Share it with guests
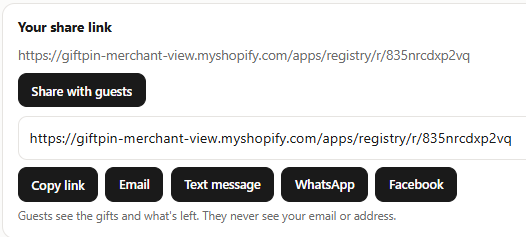
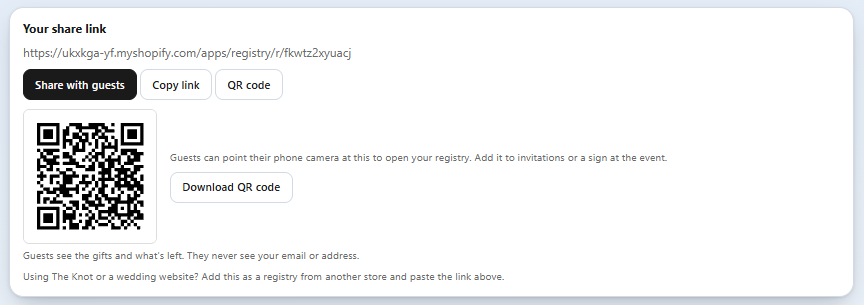
- At the top of your registry, click Share with guests and send the link by email, text message, WhatsApp or Facebook, or click Copy link.
- Prefer a code on an invitation or a sign? Click QR code beside the share buttons, then Download QR code. Guests point their phone camera at it to open your registry.
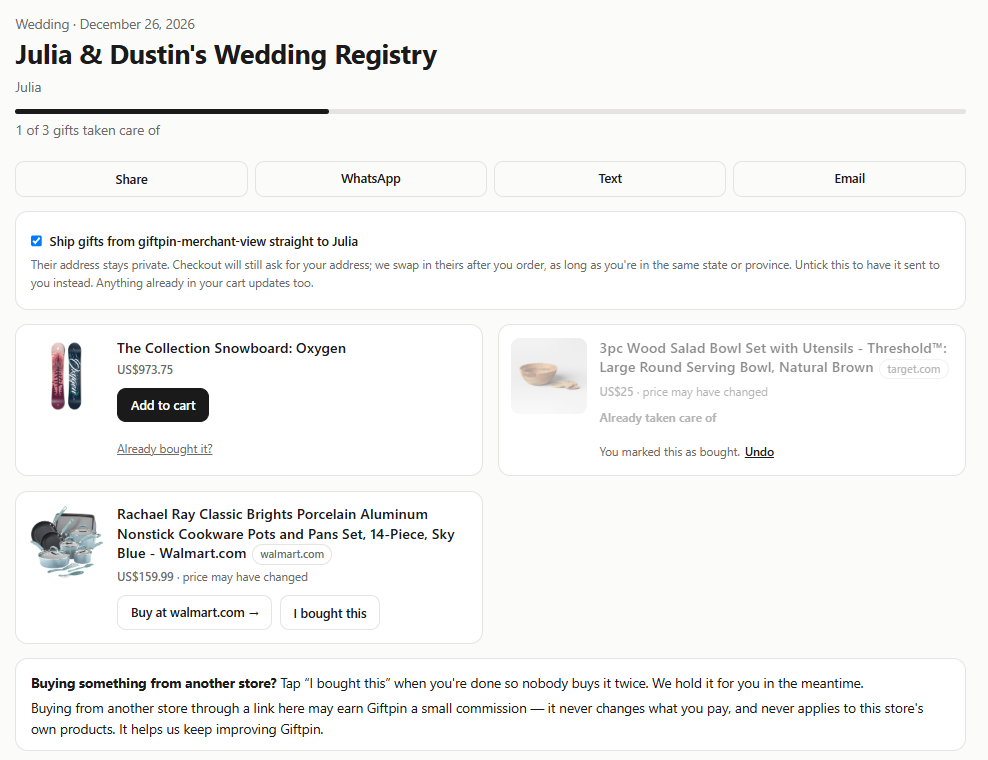
- Guests see your gifts and what's still needed. They never see your email or address, and they don't need an account.
Plan it with someone
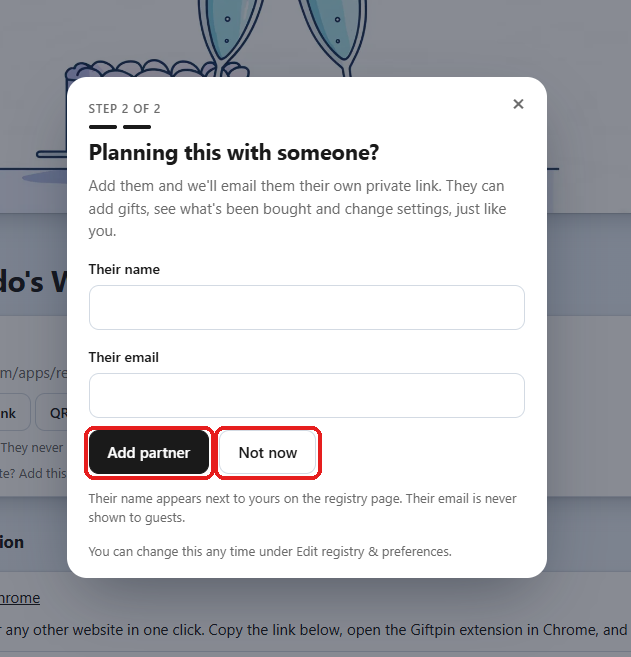
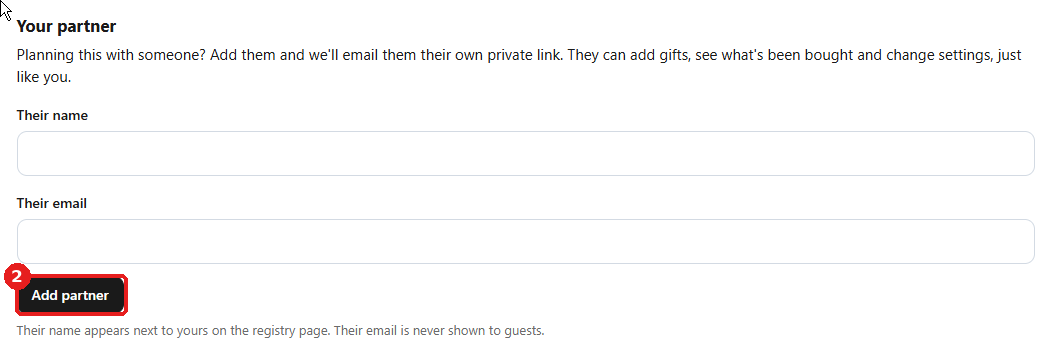
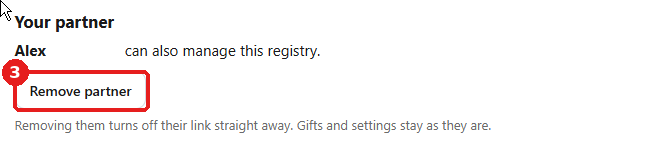
- Right after you create your registry we ask Planning this with someone?. You can also do it later: click Edit registry & preferences, scroll to Your partner, enter Their name and Their email, then click Add partner.
- They get their own private link. They can add gifts, see what's been bought and change settings. Their email is never shown to guests, and Remove partner turns their link off straight away.

Choose who can see it
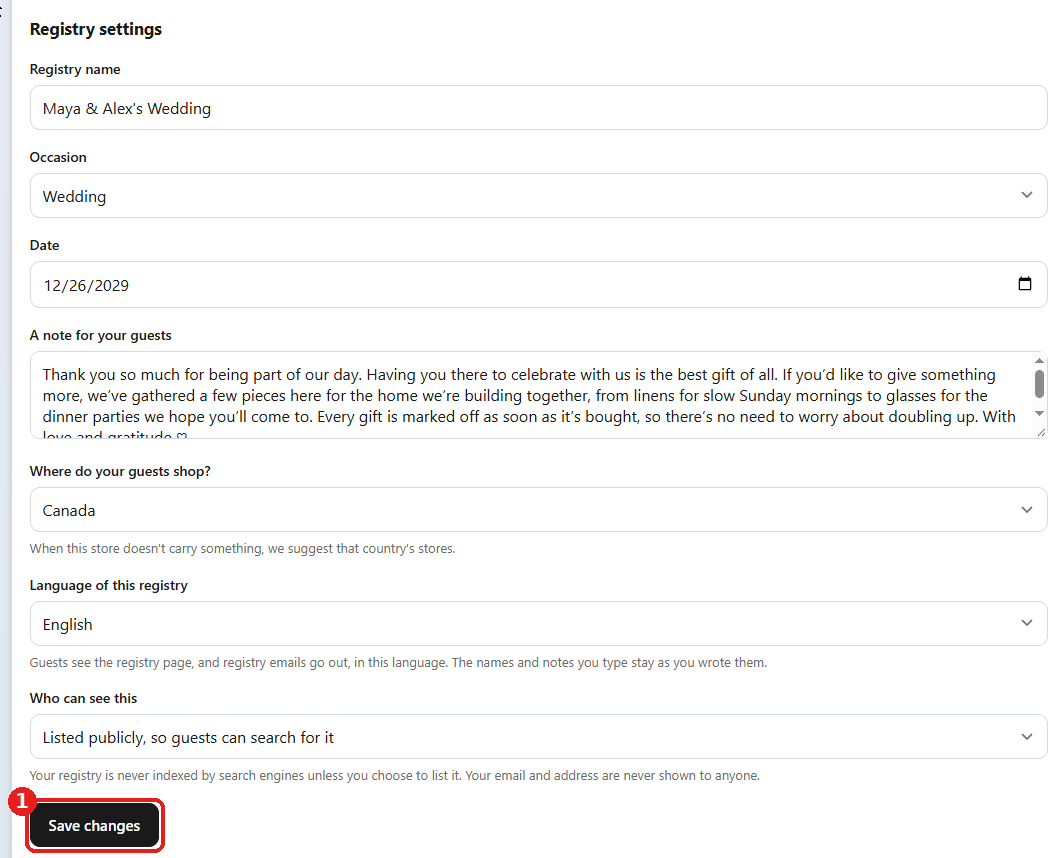
- At the bottom of your registry, click Edit registry & preferences. Under Registry settings, use Who can see this: Anyone with the link (recommended), Anyone with the link and a password, or Listed publicly, so guests can search for it on the store's Find a gift registry page.
- Click Save changes. The same section lets you change the name, occasion, date and note. If the store allows it, there is also Language of this registry.

Have gifts shipped to you
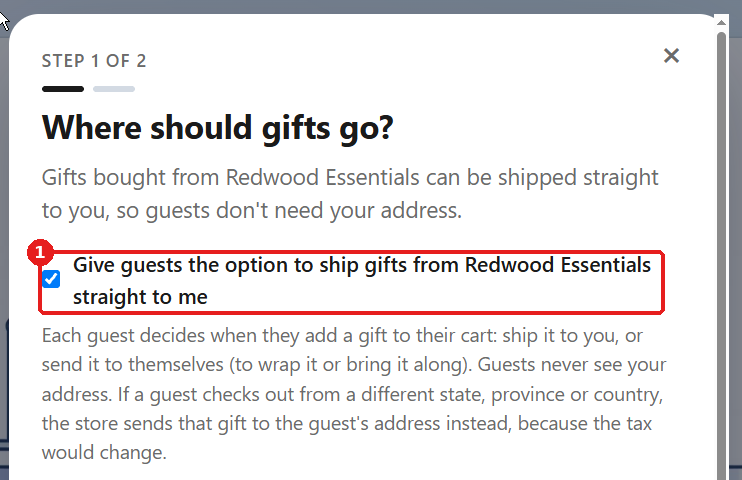
- Right after you create your registry, we ask Where should gifts go? Tick the box and enter your shipping address, or skip it for now.
- To change it later, click Edit registry & preferences, then under Let guests ship gifts to me tick the box, enter your address and click Save. Guests can then ship gifts from this store straight to you.
- Each guest decides when they add a gift to their cart: ship it to you, or send it to themselves. Guests never see your address.
Add a QR code, and find all your registries
- On your manage page, click QR code, next to Copy link, to show a QR code for your guest link. Guests point their phone camera at it to open your registry, so it suits invitations and signs at the event. Download QR code saves it as an image.
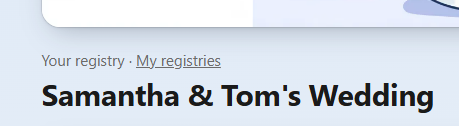
- Click My registries at the top of the page to see every registry you've started with the same email. Keep that link to yourself: anyone who has it can edit those registries.
Where to press Save
A registry only keeps what you save. Each part of the page has its own button.
Which button saves what
- Save changes is at the end of Registry settings, inside Edit registry & preferences near the bottom of the page. It saves the name, occasion, date, note and who can see it. If you changed something and left without it, the change is lost.
- Save inside Let guests ship gifts to me, just below it in the same panel, saves your shipping address. It is separate from the button above, so press both if you changed both.
- Add partner in Your partner, below that, sends your partner their link and saves them.
- Update on an item saves that item's quantity, note and category.
- Add to registry saves a new item as soon as you click it.
- You'll see Your changes are saved. near the top of the page once it worked.



Common questions
How do guests avoid buying the same thing?
Orders from this store update your registry automatically. For gifts from other websites, guests tap I bought this after buying, and the item shows as taken. Guests who change their mind can undo it for 24 hours.
How do I know who gave me what?
Your registry has a Who gave what list for your thank-you notes, and Giftpin emails you when someone buys a gift.
Can guests chip in toward something big?
If the store offers it, yes. Your registry can turn an item into a group gift, or hold a cash fund for a honeymoon or a house, paid as the store's gift cards.
I changed something and it didn't stick.
Press the Save button for that part of the page: Save changes in Edit registry & preferences, Save under Let guests ship gifts to me, or Update on an item.
Can I delete my registry?
Yes. Click Edit registry & preferences at the bottom of your registry, then Delete registry. This removes every item and the record of who bought what, and it can't be undone.